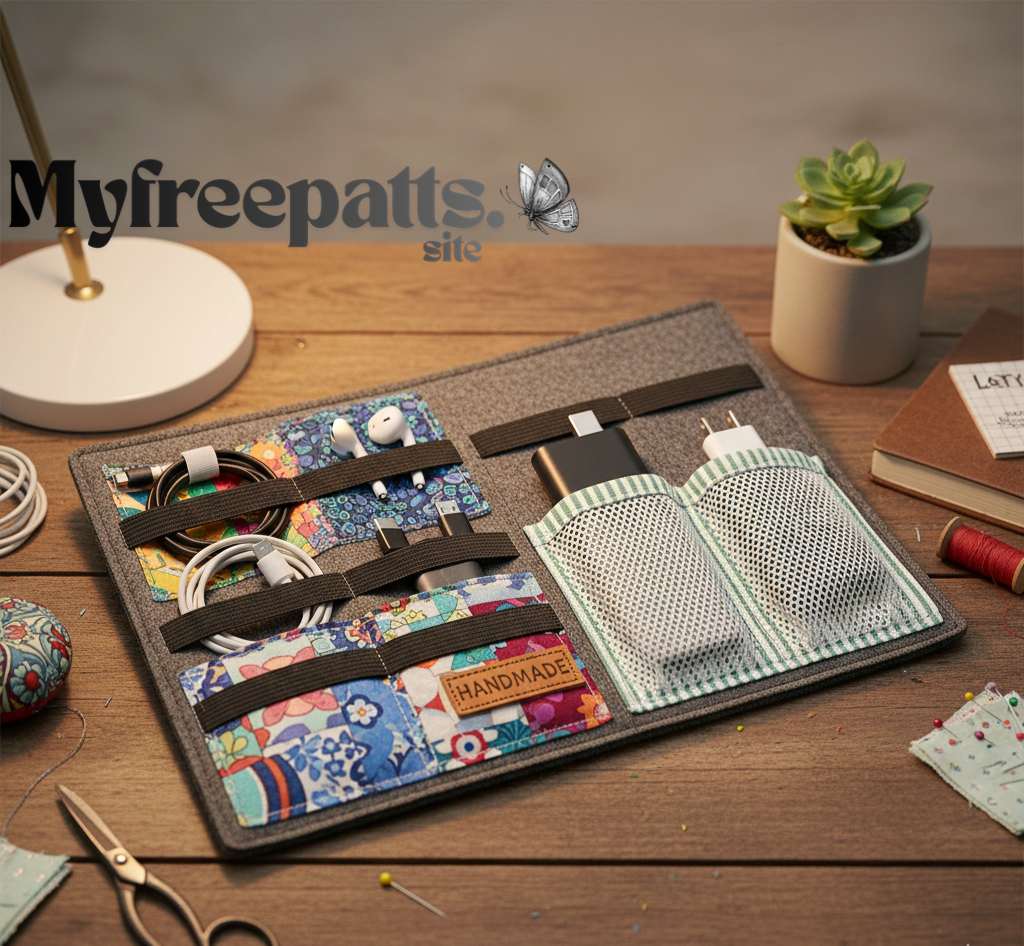
Tangled charging cables are one of the most frustrating parts of traveling. Whether you’re packing phone chargers, earbuds, or USB cables, a simple travel cord organizer can keep everything neat, protected, and easy to find.
The best part? You can sew this compact organizer in about 20 minutes, even if you’re a beginner. This project uses small fabric pieces, making it perfect for using up scraps.
Why Make a Travel Cord Organizer?
A fabric cord organizer is lightweight, washable, and customizable — much better than tossing cords loose into your bag.
Benefits of a DIY cord organizer:
✔ Keeps charging cables untangled
✔ Protects cords from damage
✔ Easy to pack in carry-ons or backpacks
✔ Uses scrap fabric
✔ Makes a thoughtful handmade gift
Skill Level
Beginner
If you can sew straight seams, you can make this project.
Materials You’ll Need
- Outer fabric: 1 piece, 9” x 12” (23 x 30 cm)
- Lining fabric: 1 piece, 9” x 12” (23 x 30 cm)
- Lightweight interfacing (optional but recommended)
- Elastic cord or hair elastic (5 inches / 13 cm)
- Button (medium size)
- Thread
- Sewing machine
- Pins or clips
- Scissors or rotary cutter
Finished Size
Approx. 4.5” x 6” (11 x 15 cm) when folded — perfect for small tech accessories.
Step-by-Step Travel Cord Organizer Tutorial
Step 1 – Prepare the Fabric
- Iron interfacing onto the wrong side of the outer fabric (optional but adds structure)
- Place outer and lining fabrics right sides together
Step 2 – Sew the Main Piece
- Sew around all four sides with a ¼” (0.6 cm) seam allowance
- Leave a 2-inch opening on one long side for turning
- Trim corners to reduce bulk (don’t cut stitches)
Step 3 – Turn and Press
- Turn the piece right side out through the opening
- Use a blunt tool to push corners out
- Press flat with an iron
- Fold the opening seam allowance inward and press
Step 4 – Topstitch
Topstitch around the entire rectangle, about ⅛” (3 mm) from the edge. This closes the turning opening and gives a clean finish.
Step 5 – Create the Flap Shape
Fold the rectangle in half (short ends together).
On the top layer only, round the corners with scissors to create a flap.
Optional: Topstitch around the curved flap edge for a polished look.
Step 6 – Add the Elastic Closure
- Fold the elastic in half to form a loop
- Place the raw ends centered on the bottom back edge of the organizer
- Stitch back and forth several times to secure
Step 7 – Sew the Button
Fold the organizer closed to find where the elastic loop naturally falls.
Sew the button onto the front flap in that spot.
Make sure the elastic loop can stretch over the button snugly.
How to Use Your Cord Organizer
Open the flap and wrap cords loosely inside. You can store:
Phone chargers
Earbuds or small headphones
USB cables
Small adapters or memory cards
Fold the organizer closed and loop the elastic over the button to secure.
Customization Ideas
Make it uniquely yours:
Add interior pockets before sewing
Use waterproof fabric for extra protection
Quilt the outer layer for padding
Add a label tag
Make a larger version for tablets and chargers
Care Instructions
✔ Machine wash gentle
✔ Air dry or tumble dry low
✔ Iron if needed
Because it’s fabric, it’s easy to keep clean while traveling.
Why This Is a Great Scrap-Busting Project
This organizer uses small fabric pieces, making it perfect for leftover cotton from quilting or sewing projects. It’s fast, useful, and a great way to reduce fabric waste.
Final Thoughts
A travel cord organizer is a simple sewing project that solves a common everyday problem. It’s quick, beginner-friendly, and incredibly practical — ideal for travel, work, school, or daily commuting.
In just 20 minutes, you can create a reusable organizer that keeps your tech accessories neat and easy to find wherever you go.
Happy sewing and safe travels